Embarking on a SharePoint site migration? Don’t sweat it. Learn from our experience: seamless moves from old to improved, start to finish.
The road to a successful SharePoint site migration is paved with good intentions, but often doesn’t go the way you want it to if certain considerations are not taken into account.
There’s tons of data being created by multiple users within the existing environment. Before moving everything to your new and improved SharePoint, you must ensure you don’t tamper with things too much.
To ensure things go smoothly, create a detailed plan that covers all the nitty gritty aspects of the migration process. From pre to post-migration, ensuring zero hiccups requires understanding the nuance of a successful SharePoint site migration.
Here, we share our years of experience migrating SharePoint sites and the tools and processes necessary to make it smooth and seamless. Let’s get started!
Table of contents
When to consider a SharePoint site migration
When organizations start to ask themselves whether a SharePoint migration should be on their to-do list, chances are that they do need a site migration and fully embrace a modern workplace. In any case, migrating helps enhance collaboration and content management capabilities, and equips you with the latest capabilities of SharePoint.
Here are all of the reasons for a SharePoint site migration to be on the books:
1. You’re using an older version of SharePoint
Organizations often reach a stage where they have created an excessive number of internal sites. This creates issues with content management, and older versions of SharePoint can’t handle growing demand. When this happens, it’s wise to migrate to a newer version or to SharePoint Online.
The result: Enhanced performance and scalability, creating a smoother user experience.
2. You notice security has its limits
Organizations using older versions of SharePoint are missing out on powerful security capabilities in SharePoint Online. Older versions pose a security threat because they’re not equipped to handle sophisticated security threats. Newer versions have effective compliance tools that make it easier to handle industry regulations.
The result: Bolstered security, achieving greater regulatory compliance.
3. User collaboration is restricted
Newer versions of SharePoint come equipped with powerful collaboration capabilities. In fact, collaboration is Microsoft’s ethos, with the company adding tons of features to SharePoint to make it easier for everyone to work together.
The result: Improved collaboration and organizational efficiency.
Key considerations before initiating a team site migration
So you’ve decided to make the move and migrate. The next step is to come up with an effective cloud migration strategy. The first phase of this strategy will be prepping for migration and setting up a test environment.
Here are all the key considerations to keep in mind as part of your migration project:
1. Data assessment: Spend time categorizing the data in your current environment and mark all unnecessary data that doesn’t need to be migrated to your new environment. This is a chance to clean up and keep what’s useful.
2. Permissions mapping: You should have a detailed plan for migrating current permissions from your source environment to your target environment. A management solution for Microsoft 365 like ShareGate can reduce manual effort.
3. Backup and restore strategy: Data loss during migration can happen, and poses a serious risk during migration. Make sure to back up all data somewhere safe, and have a backup and restore strategy to counter this risk.
4. Testing environment: To make sure things go smoothly during the actual migration process, it’s a good idea to establish a test environment where the migration can be tested and all issues resolved beforehand.
5. User communication: Inform stakeholders before the migration process and the potential downtime they may encounter. You can ask everyone about the data that won’t be moved and get their feedback about whether they think that information could prove useful later on and should be part of the migration.
6. Migration methodology: Create a migration methodology where you highlight important details like project scope, complexity, deadlines, and so on. ShareGate can help with this!
Choosing the right strategy and SharePoint migration tool
Two things: Ensure your SharePoint migration approach meets your organization’s needs and select a migration tool that streamlines the process. Having the right strategy and tool is crucial for a successful transition.
Here are some things to think about:
1. Assessing complexity: Drill down on the complexity of the migration process specific to your organization, and ensure that you have all migration tasks structured in a way that you can approach all of the aspects of migration. This assessment would also help you proactively troubleshoot common errors.
2. Support for both source and target versions: The migration tool you use must support both the source and destination SharePoint versions.
3. Understanding data volume: Understand the total volume of data that will need to be moved (are you migrating entire document libraries?) and evaluate whether the migration tool you use can support it. You can use JSON or CSV file format for bulk migration.
4. Moving metadata and permissions: Moving metadata and permissions accurately is crucial in the migration process. A detailed plan and a reliable tool are essential. This is especially true when migrating data from an on-premises SharePoint server.
5. Keep it simple: We cannot stress this enough: keep the migration process as simple as possible. Opt for an easy-to-use migration tool that does the heavy lifting and automates the work.
Implementing data and content migration with ShareGate
Migrating site collections
Step 1: Identify unresolved users at your destination site
First thing you’ll like to know when you migrate site collections is if you have any unresolved users at your destination.
Step 2: Map missing users
Map those missing users to others who took their place or activate any necessary users. Using the ‘Copy Site Objects’ tool, you can select all your users from your source top-level site and copy them to your destination top-level site.
Step 3: View unresolved users
Once the operation is completed, look at your SharePoint Migration report: all the unresolved users will be displayed as errors.
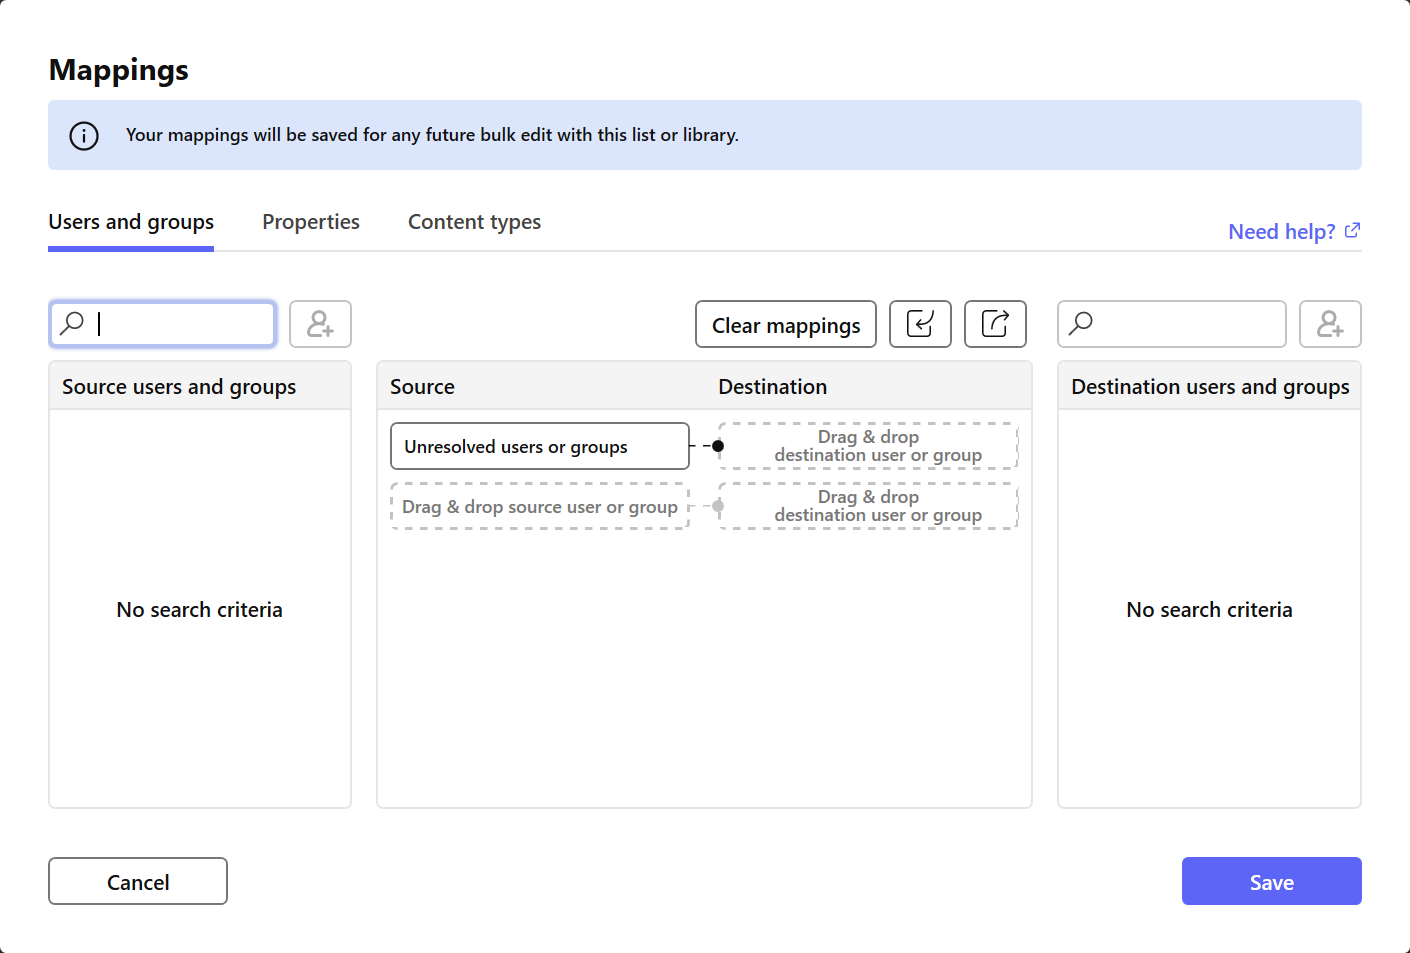
Step 4: Take care of mappings
What’s now to be taken care of is all the mappings. This simple yet essential step will allow you to avoid plenty of errors and warnings during your migration. Directly linked to the previous step, you’ll surely want to map some missing users to the ones that are now replacing them.
You can also set a default user for ShareGate to bounce back to when it encounters any unresolved users. Check out our detailed blog post about preserving user values during your SharePoint migration.
Step 5: Map your site templates
Further on, you can map your site templates. When you’re migrating between two different versions of SharePoint, some elements might be deprecated or discontinued, notably site templates. Setting a default site template for ShareGate to fall back to will surely help you migrate your whole site collection and overcome these changes.
Step 6: Permissions mapping
Finally, to wrap up mappings, go ahead with permissions mapping. If you had any custom permission level at the source that you would like to remap to built-in permission levels, this is the time to do it.
Step 7: Migrate your Term store
Now migrate your Term Store (very useful if you are migrating to a new environment). To get your Managed Metadata migrated, simply use ‘Copy Site Objects’ tool and select ‘Managed metadata’ in the Navigation pane. However, before starting this operation, please make sure the Term Store Administrator rights are granted to you.
Step 8: Finally, copy your SharePoint site!
Click on “Current Site”, select your site, and Voilà! Let the migration run. Within the Copy options window which will be automatically prompted when clicking on the ‘Copy’ button, you’ll be able to select all the elements you would like ShareGate to copy over to your destination site.
Important note: If you check the ‘Custom Permissions’ checkbox, it will automatically overwrite all the permissions you’ve previously set at your destination. So even if you’re merging your current SharePoint site to your destination SharePoint site, permissions won’t merge, they’ll overwrite those you’ve previously set.
That’s it!
Smooth migrations. We got this.
Your chances of a successful and smooth SharePoint migration are only as good as the planning that goes into it and the tools you use to execute the migration. Paying close attention to both factors increases your chances of overcoming potential roadblocks.
Make ShareGate’s easy-to-use and powerful SharePoint migration tool and checklist part of the equation, and see the results for yourself. We help organizations make the move in a seamless, error-free manner.